

- 현재 위치
- HOME > Lever > Sanjuks Lever


|
ISTMALL · SANJUKS LEVER SANJUKS V7SANJUKS V7 · Interchangeable Collar The return-to-center feel of a Hyper grommet. Built on the V6 platform
Hyper grommet for the Knee Lever · V7-specific bobbin Acetal capsule grip · Full or Mid Collar Before You OrderOptions — Choose your combination of 2 body colors, 2 grip colors, and 2 collar heights. Fitment — Check the collar clearance, top-panel opening, mounting holes, and space inside your fightstick. Wiring — The V7 uses 8 individual switch terminals. A compatible conversion harness is required if your existing wiring uses a 5-pin connector. 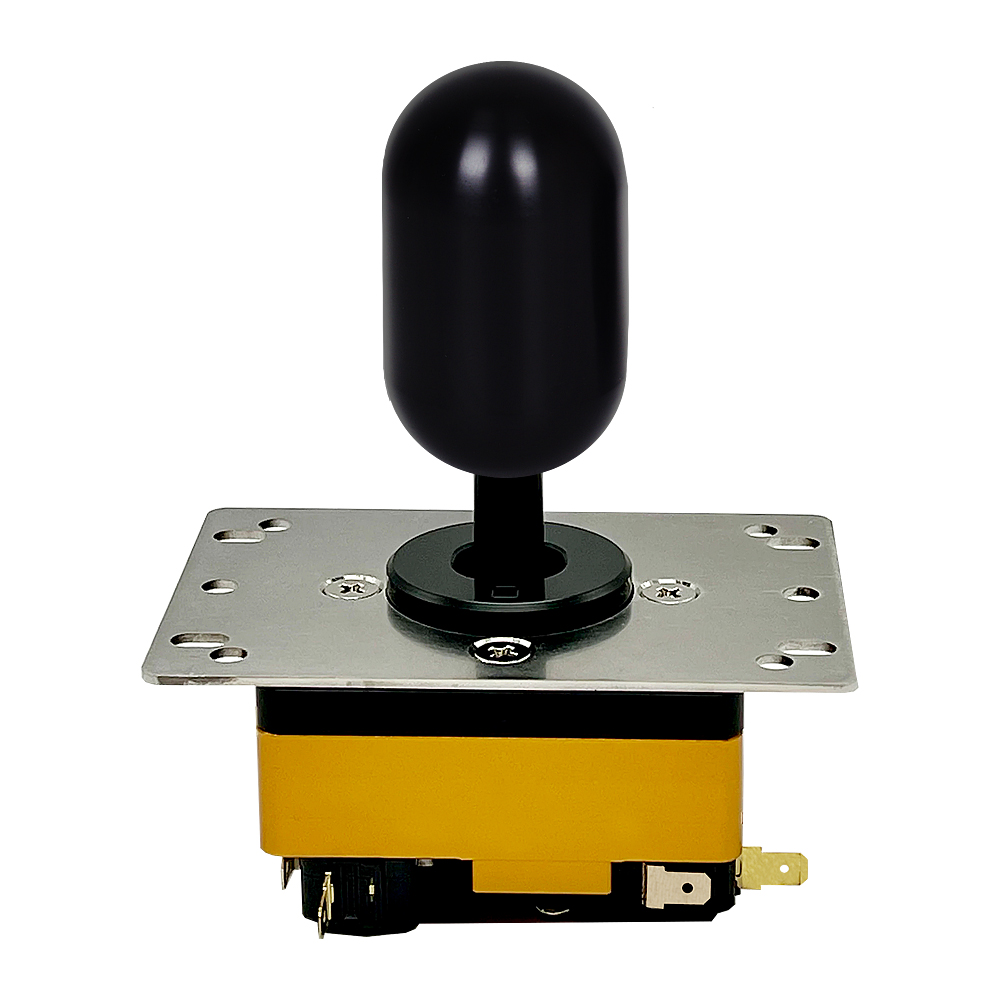
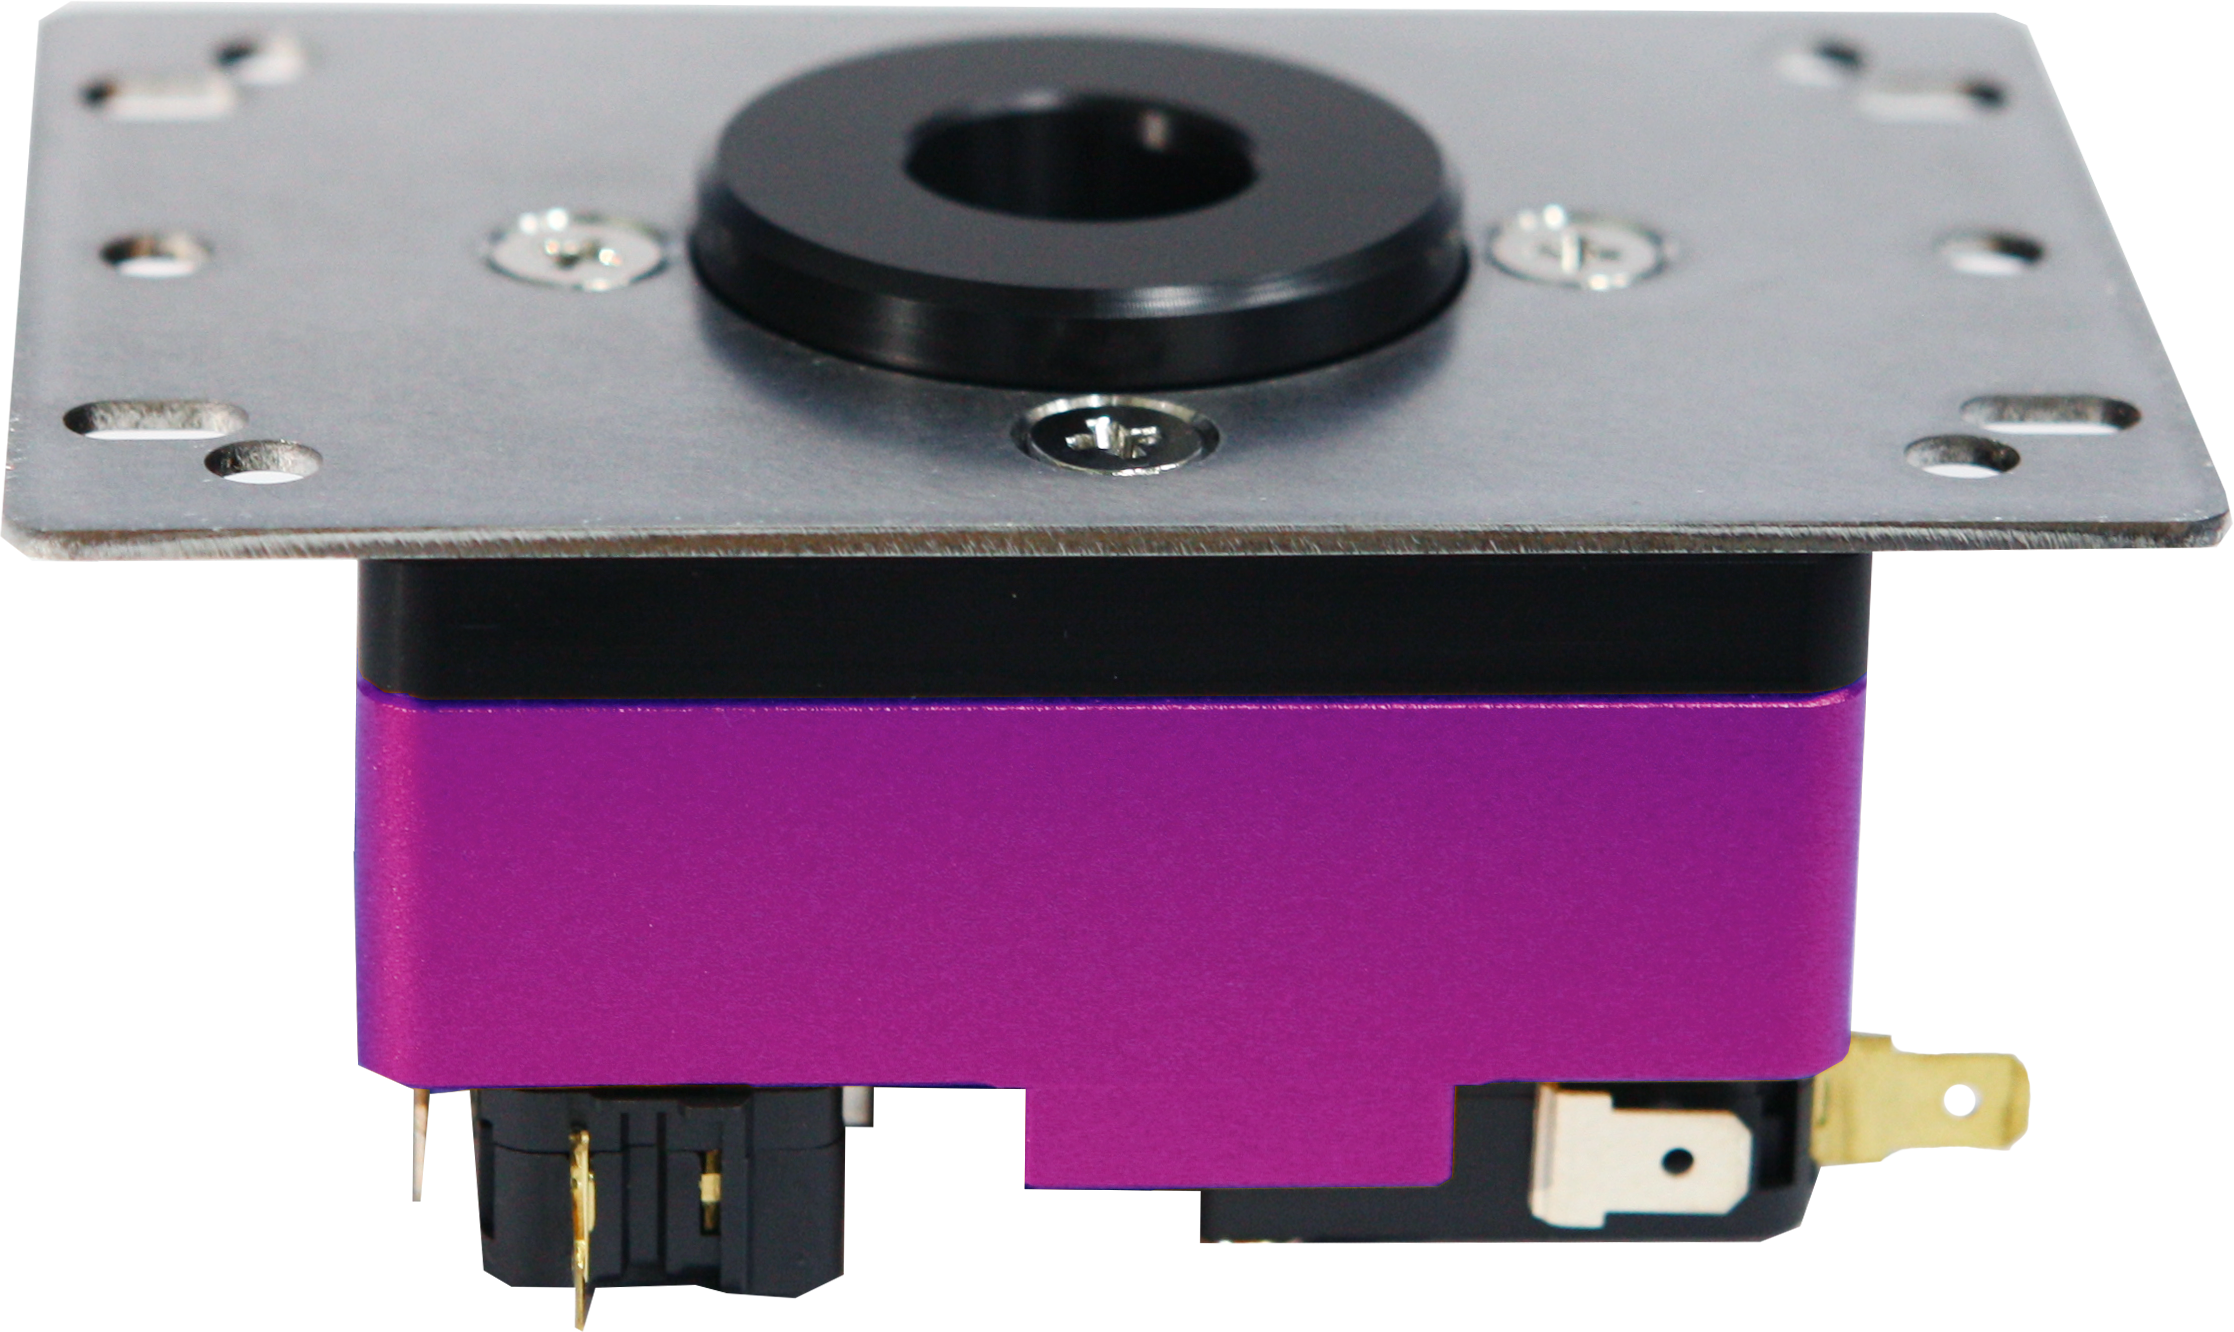
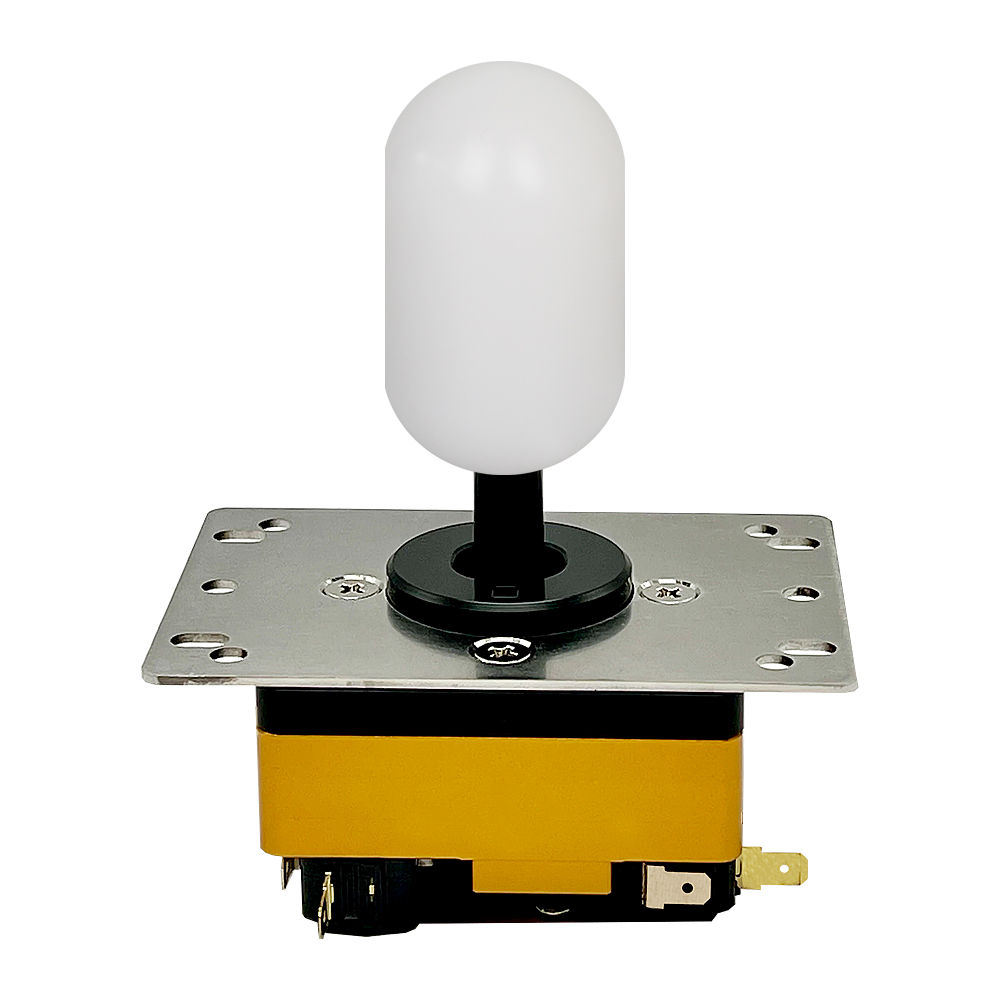
Example shown: Gold body, black acetal capsule grip, and Mid Collar. Your product will match the options selected when ordering. 01 · SANJUKS V7 A New Grommet and Grip Define the V7Based on the V6, the SANJUKS V7 features changes to the grommet, grip, bobbin, and underside switch layout. Introduced as an interchangeable-guide lever for Tekken, it lets you choose a grip and collar height to suit your fightstick setup. 01. Hyper Grommet for the Knee LeverThe V6's Samducksa grommet has been replaced with an IST Hyper tension grommet for the Knee Lever. The grommet affects both the resistance you feel when moving the lever and its return-to-center feel when released. 02. V7-Specific Bobbin for the GrommetThe V7 uses a V7-specific bobbin matched to the Hyper grommet. Located at the center of the grommet, the bobbin transfers shaft movement to it. Using the correct grommet-and-bobbin combination is essential. 03. Acetal Capsule GripThe previous polycarbonate bat top has been replaced with an acetal capsule grip for users who prefer a rounded capsule shape. The capsule grip supplied with the ISTMALL version is manufactured by ISTMALL. 04. Revised Underside Switch LayoutThe lower aluminum housing features a revised switch layout with Omron V-16-3C26 microswitches. The actuator at the bottom of the shaft engages the four directional switches to register inputs. 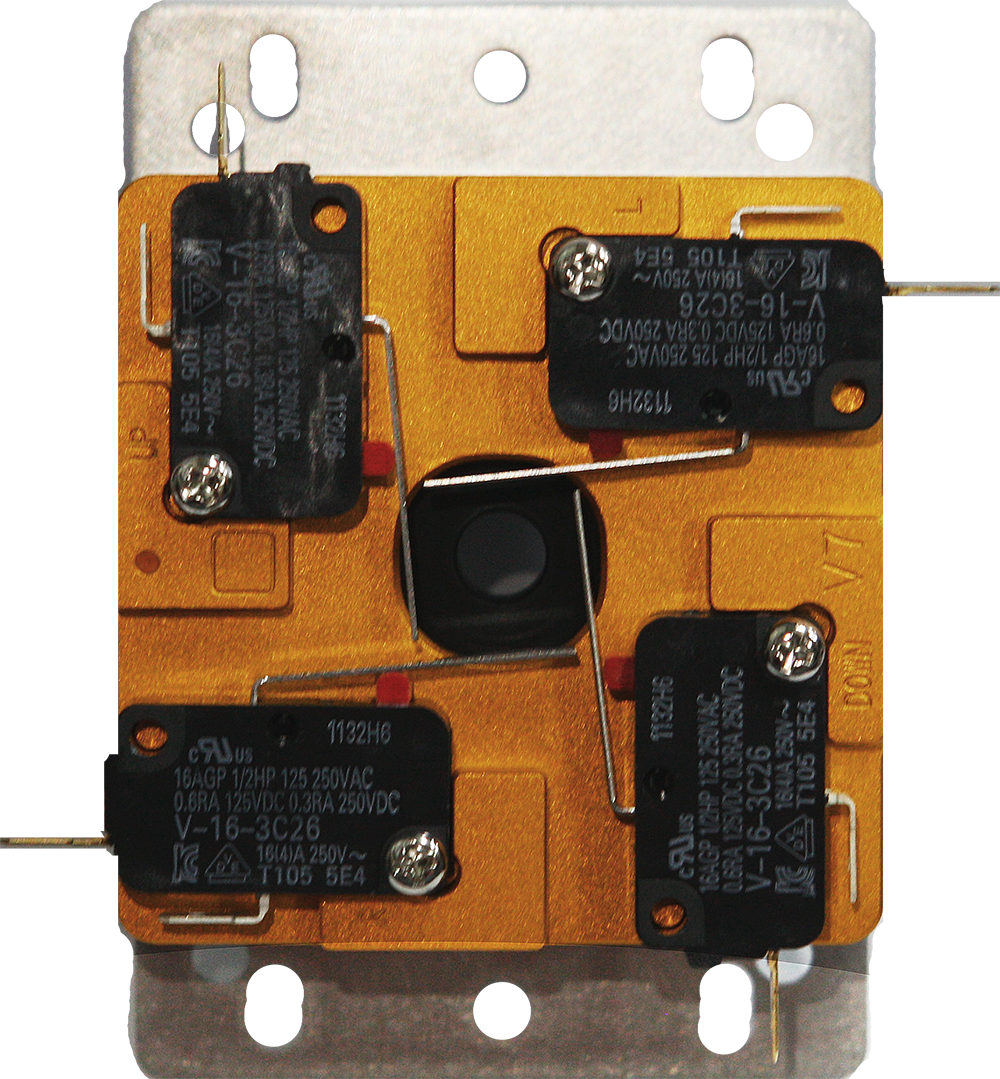
02 · SANJUKS V7 Choose Your Body and Grip Colors
Body Colors · 2 Choices
Acetal Capsule Grips · 2 Choices
The grip comparison photos show a Gold body. Body and grip colors can be selected independently; one lever in your selected combination is supplied. Actual colors may vary slightly from the photos due to lighting and display settings. 03 · SANJUKS V7 Full Collar or Mid Collar?The collar is the raised section around the shaft. Choose Full Collar for the taller version or Mid Collar for the shorter version. The V7 has an interchangeable collar/guide design and comes with a circular guide in the selected collar height. Full CollarThe taller collar extends above the top panel. A 35 mm top-panel lever opening that accommodates the collar's outer diameter is required. Check that your panel supports a full-collar lever before ordering. 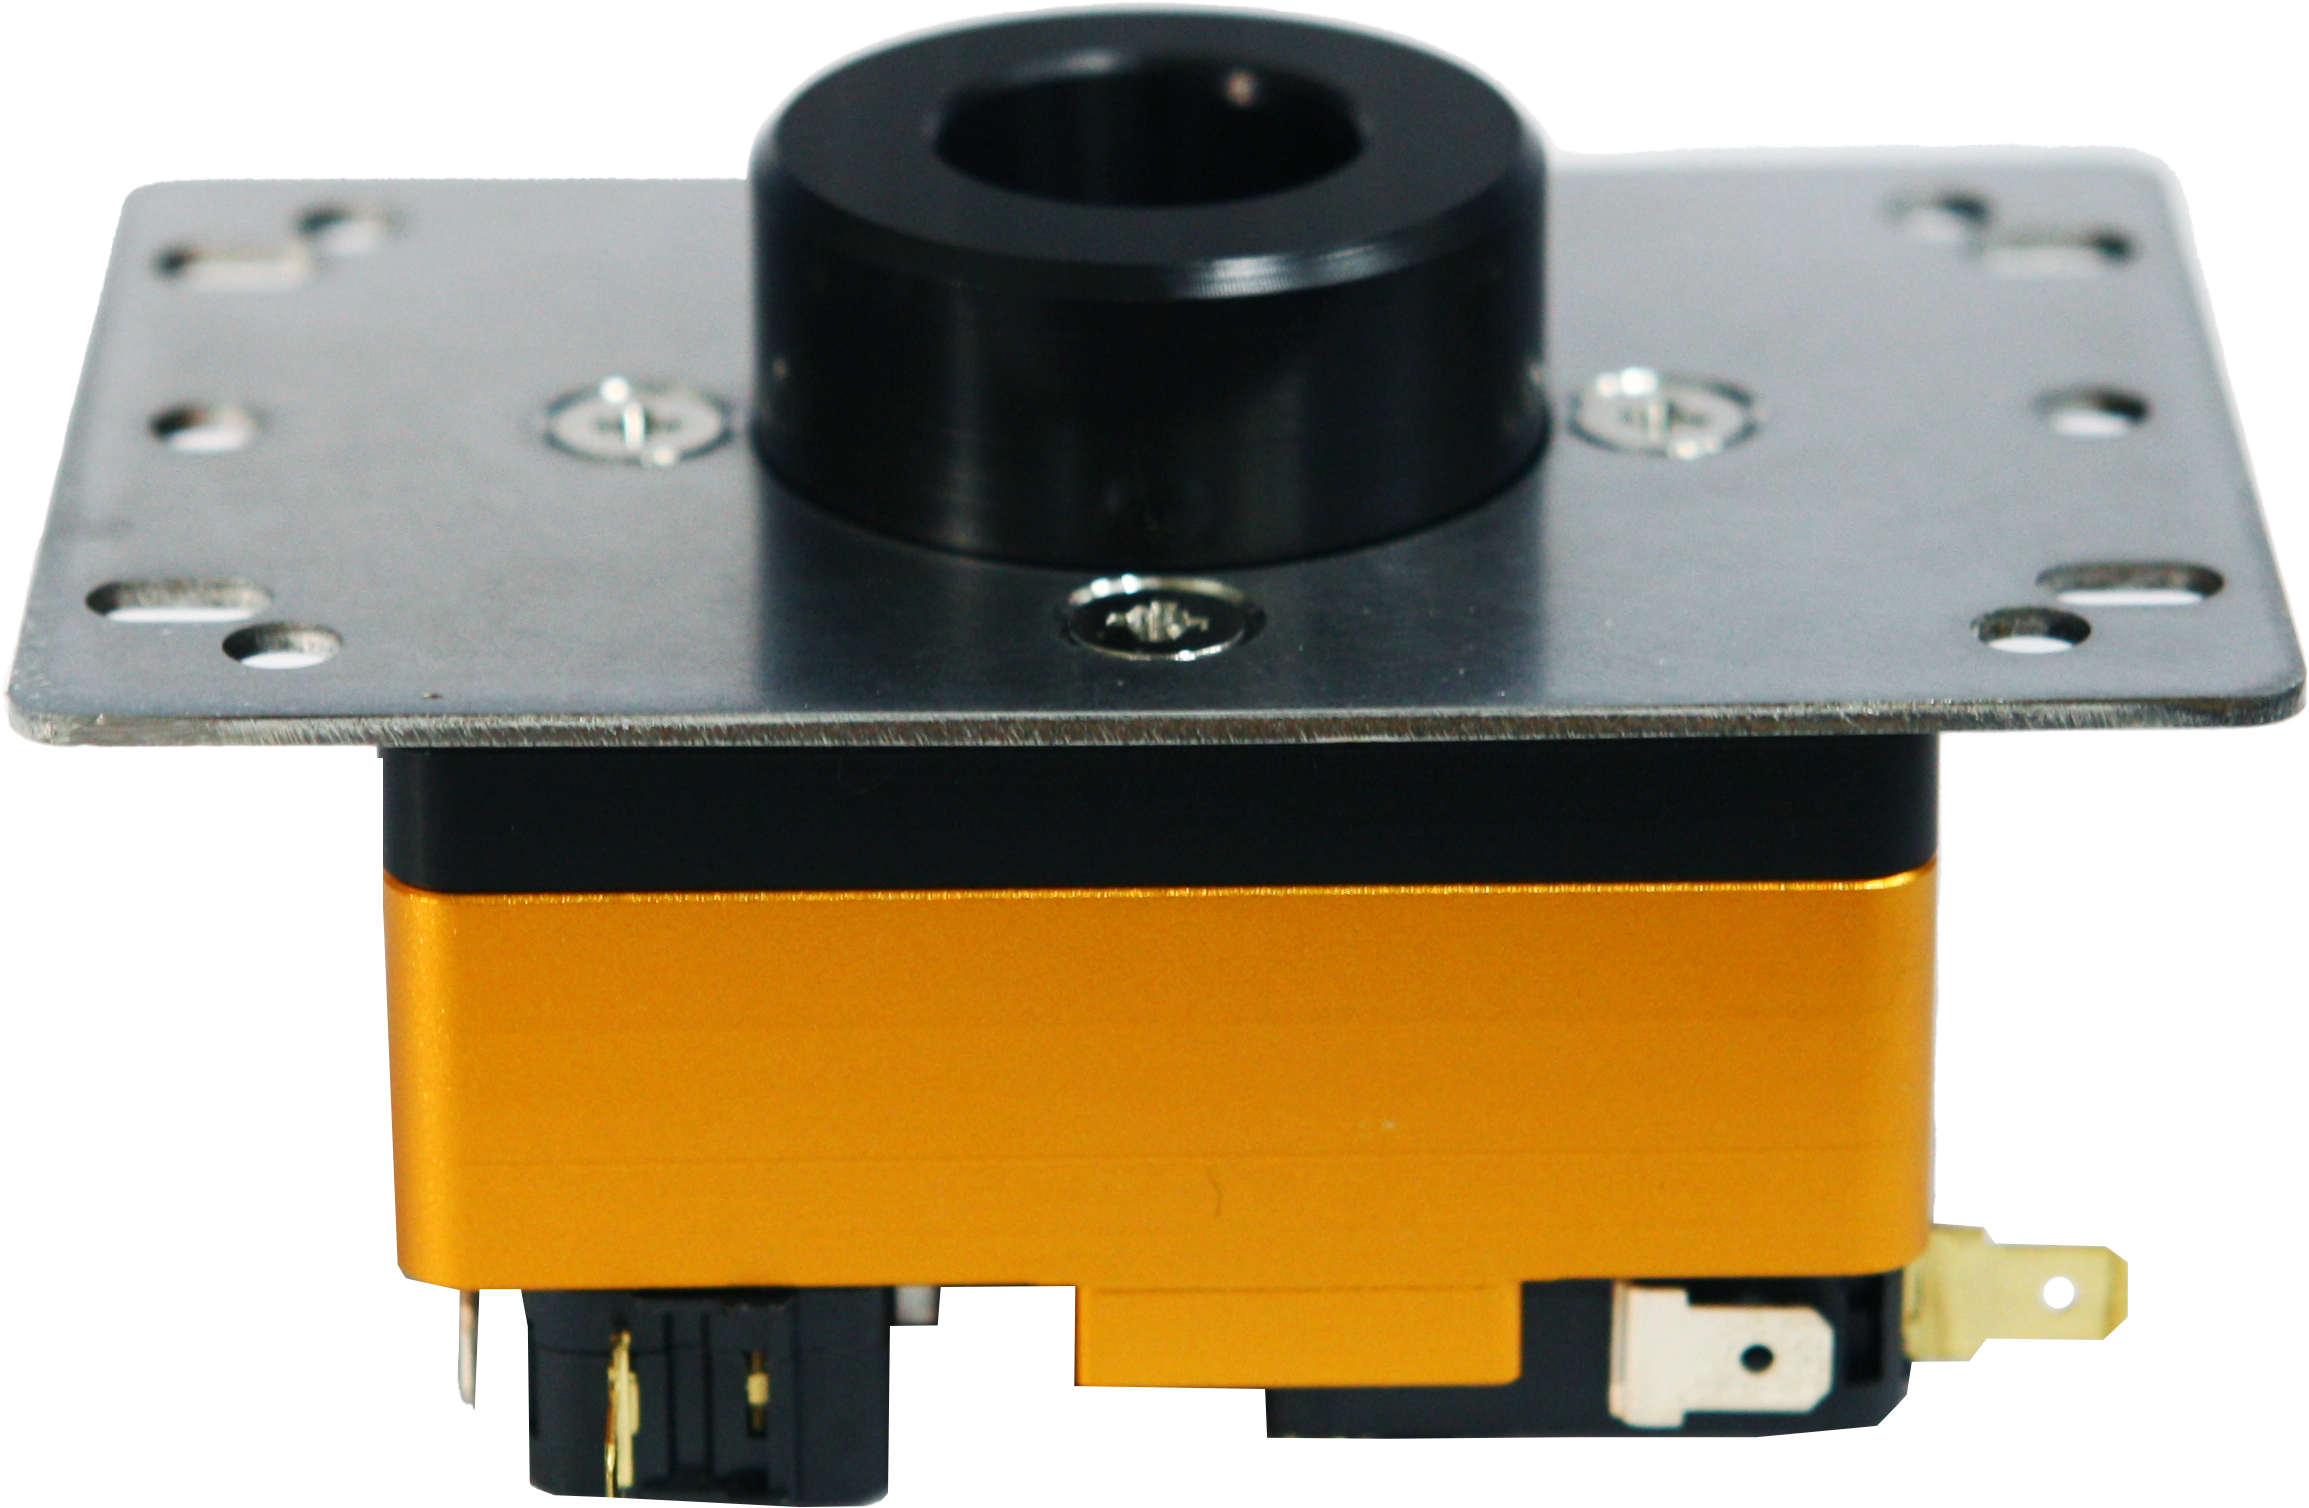
Full Collar · Note the taller raised section. Mid CollarThe Mid Collar has a lower profile than the Full Collar. It may fit overseas fightsticks with a 25 mm lever opening, but choosing Mid Collar does not guarantee compatibility with every fightstick. 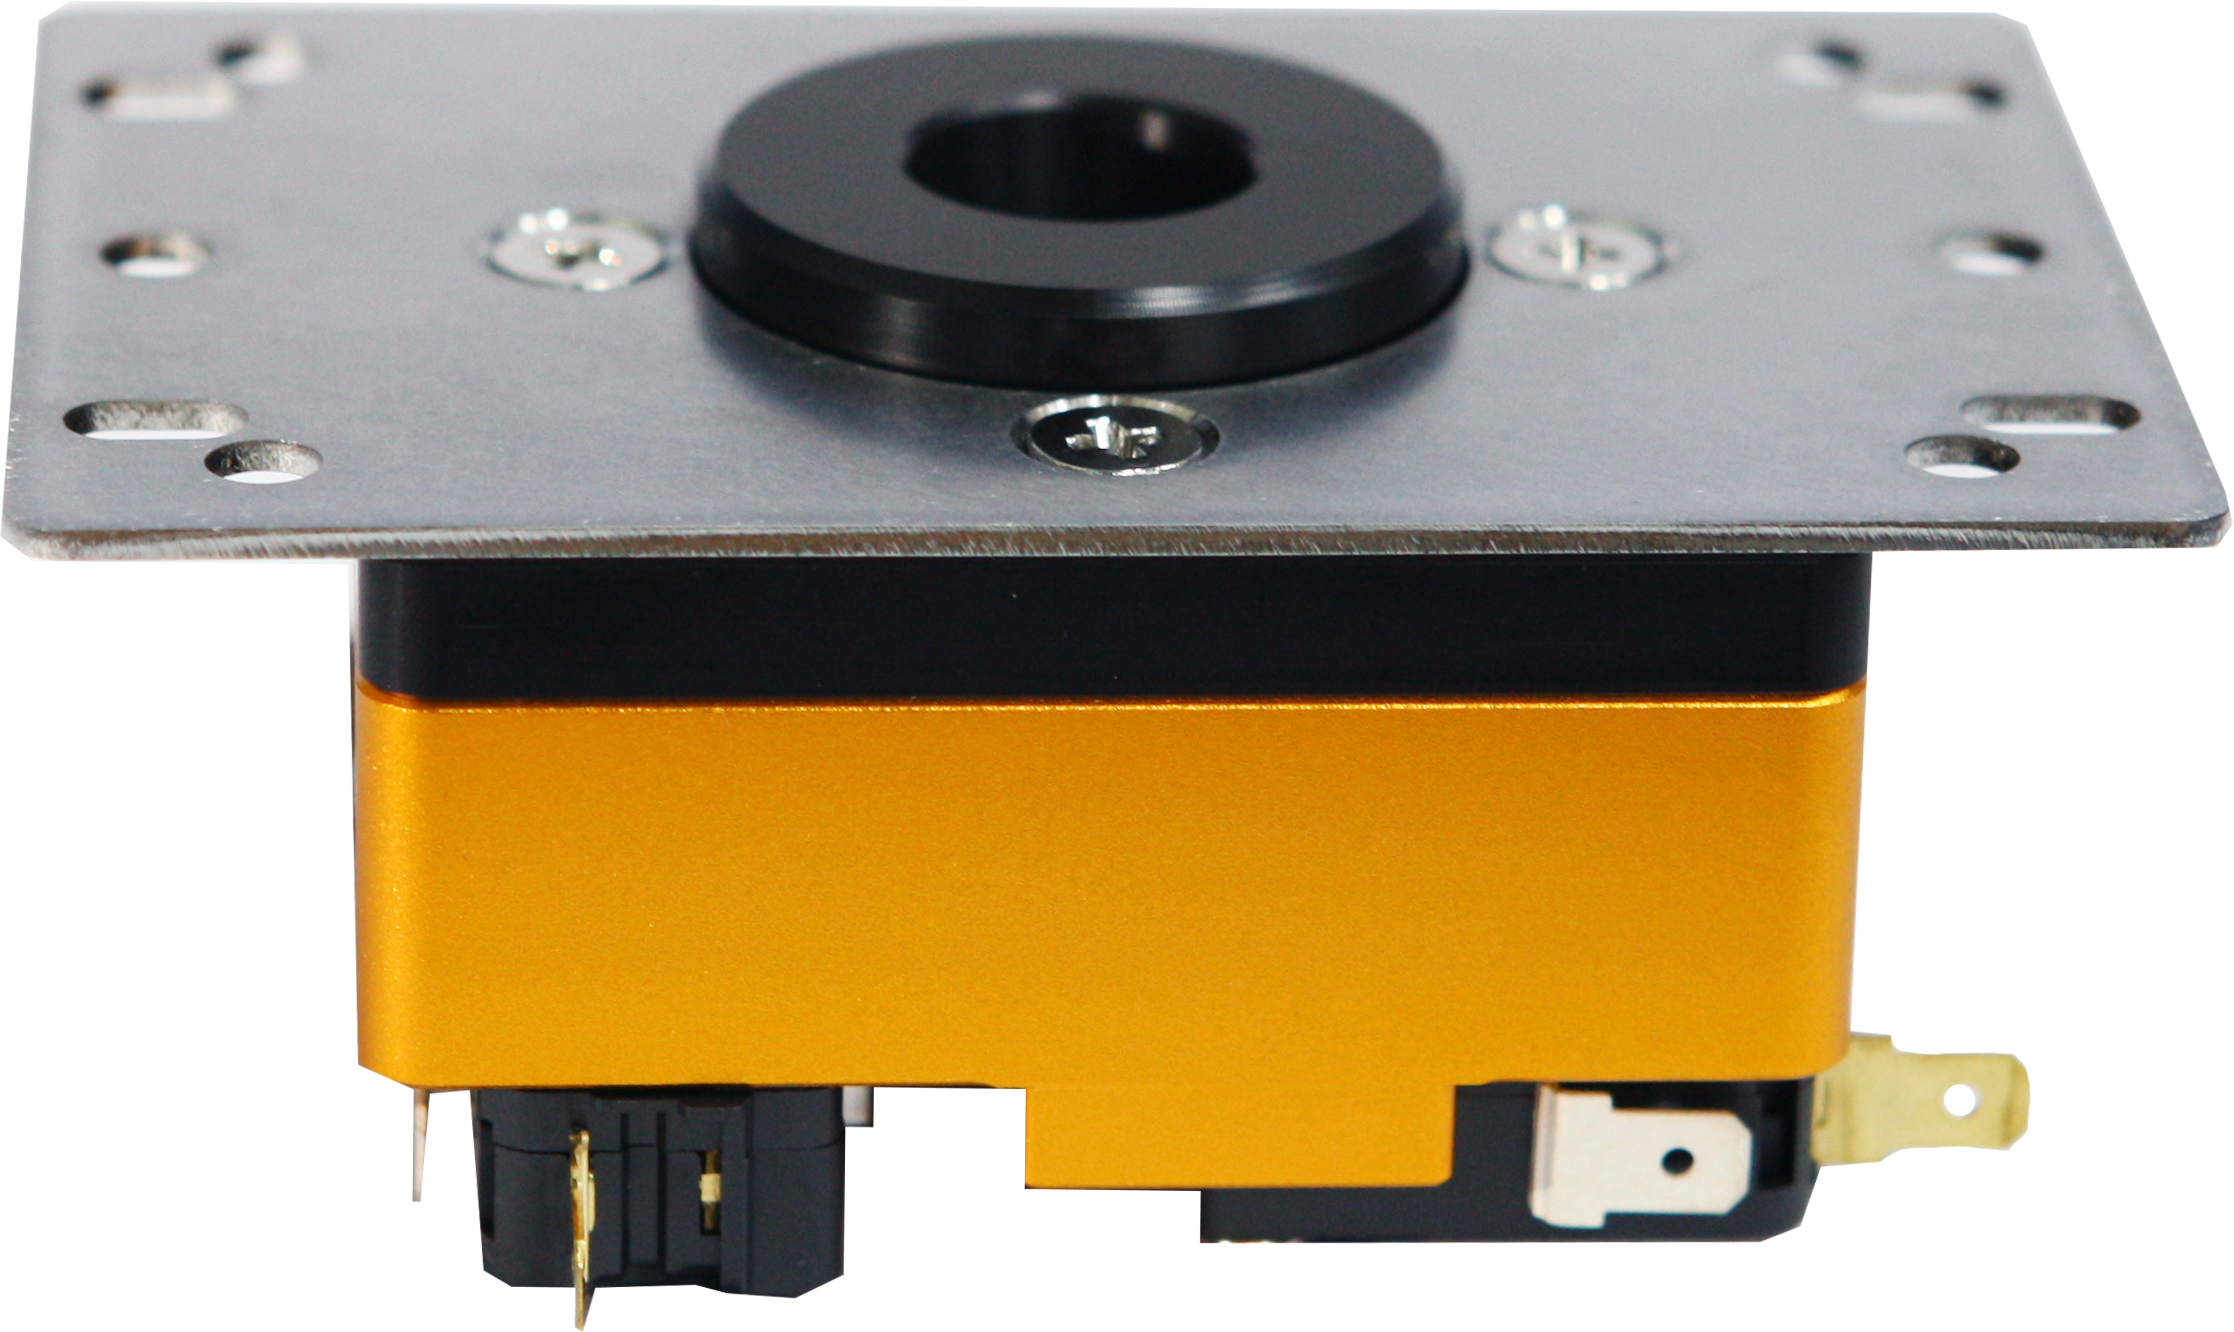
Mid Collar · Note the shorter raised section.
Collar height is a selectable option. Full Collar and Mid Collar are not both included. The circular guide defines the lever's range of movement; all four cardinal directions and diagonal inputs remain available. 04 · SANJUKS V7 Check Your Fightstick Before InstallationFitment depends on collar height, mounting-hole positions, internal clearance, and wiring. Installation requirements can differ even within the same brand, depending on the model, top panel, and internal layout.
Check newer versions and other generations separately, even if they share the same brand or model name. 01. Compare the Mounting HolesThe V7 uses an MJ multi-mounting plate. Compare the plate dimensions and hole positions in the drawing below with your enclosure. Matching screw holes alone are not enough if the collar or lower components interfere with the case. 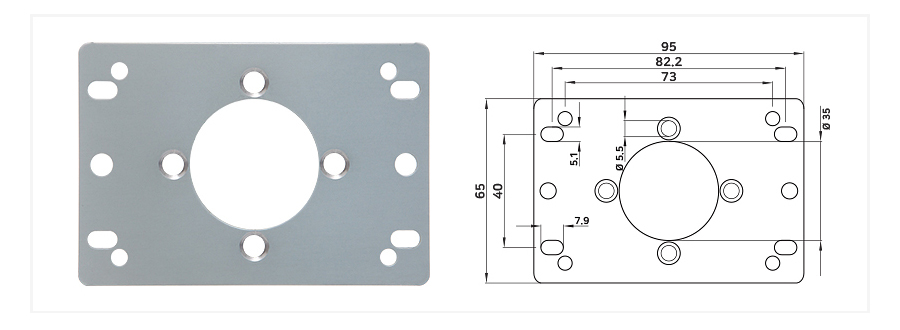
Mounting plate drawing · Dimensions in mm 02. Allow Space Beyond the Body HeightThe listed body height is approximately 36 mm, excluding the grip, shaft, and collar. The stated measurement may vary by approximately 2–3 mm. Allow additional space for the lower shaft, actuator, switch terminals, and wiring. 03. Using 5-Pin Wiring? Prepare a Conversion HarnessThe V7 uses an 8-terminal connection to individual microswitches. If your fightstick uses a 5-pin connector, you will need a compatible 5-pin to 8-terminal conversion harness. Check both your PCB's pinout and the switch terminal size. 05 · SANJUKS V7 Specifications and Included Components
Included Components
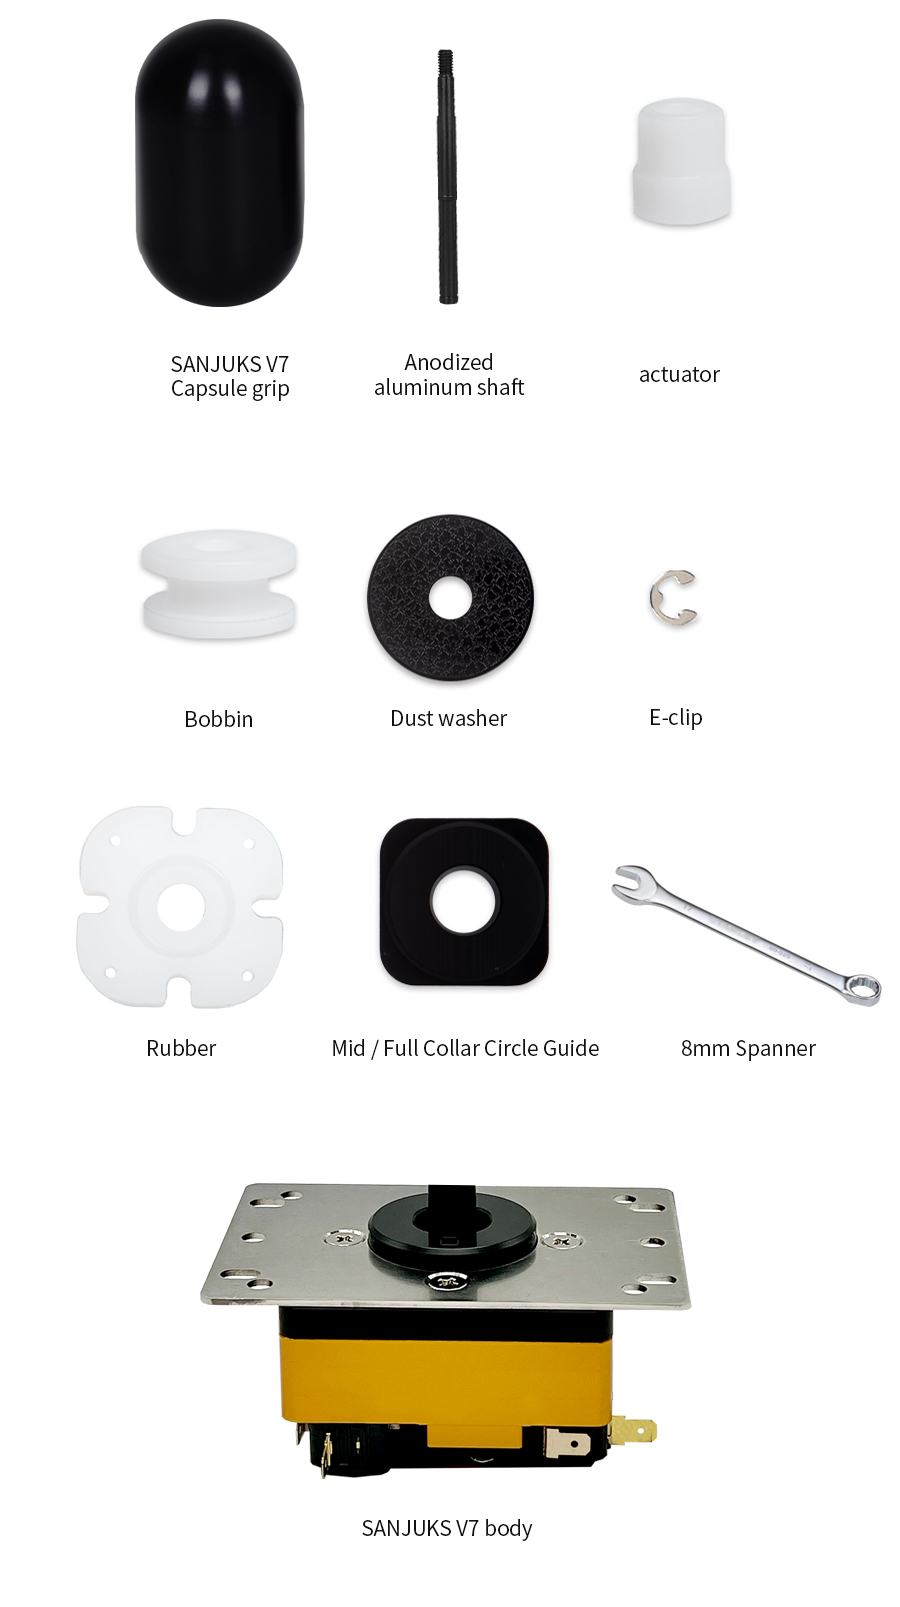
The photo illustrates the component set. Body color, grip color, and collar height are supplied according to your selected options. This list includes both preinstalled components and separately packed items. If a 5-pin to 8-terminal conversion harness is needed, please prepare it separately. 06 · SANJUKS V7 Understand the Parts. Find Your Preferred Feel.Hyper Grommet and V7-Specific BobbinThe V7 uses a dedicated bobbin matched to the Hyper grommet for the Knee Lever. Before transferring a grommet or bobbin from another lever, check that the combination is compatible with the V7. Replacement grommets must also be compatible with the V7-specific bobbin. How the Circular Guide FeelsThe stock circular guide allows the lever to follow a rounded path at the edge of its travel. The clicking sound comes from the microswitches actuating. The guide shape and the points at which the switches register inputs are separate aspects of the lever's feel. Change One Component at a TimeSome components are shared with the V6, but not all parts use the same dimensions. When choosing a shaft, guide, or actuator, check its V7 compatibility and dimensions. Changing one component at a time makes it easier to understand how each change affects the feel. Start with the Stock SetupFirst, get familiar with the return-to-center feel, diagonal inputs, and how different grip positions affect your control. Feel can vary with grommet wear, component combinations, and personal preference. Minor surface marks or scratches may occur during manufacturing and machining. If you have a question about the finish or operation, please contact us with photos and a description of the issue. 07 · SANJUKS V7 First-Time Installation GuideSTEP 01 Record the Existing SetupDisconnect your fightstick's USB cable and power before opening the case. Take photos of the existing lever orientation, wiring, and screw positions to help with reassembly and input checks. STEP 02 Check Collar Clearance and Mounting PointsConfirm that the selected Full Collar or Mid Collar clears the top panel. Before securing the mounting plate, check that there is enough room for the lower shaft and wiring. Do not force parts into holes or mounting points that do not fit. STEP 03 Secure the Grip and Lower ComponentsHold the shaft's wrench flats with the 8 mm wrench while tightening the capsule grip. Check that the actuator is correctly assembled and that the E-Clip is fully seated in the shaft groove. The wrench holds the shaft steady while you tighten the grip. STEP 04 Connect the Wiring and Test Every DirectionConnect the switch terminals without stretching or pinching the wires. Remove your hands and tools from the case, then reconnect power. Use an input test screen or practice mode to check up, down, left, right, diagonals, and neutral. Once everything works correctly, disconnect power again and close the bottom panel. If a Direction Registers in ReverseDisconnect power, then check your wiring photos and PCB pinout to correct the signal connection for the affected direction. Identify the common ground and directional signal wires rather than relying on wire colors alone. Check the connections before attempting to bend any microswitch levers. Unsure About Collar Height or Fitment?
|