




- 현재 위치
- HOME > Lever > Bandits Lever

 View in Bigger Image


|
ISTMALL · SANJUKS LEVER SANJUKS V3 PREMIUMSANJUKS V3 PREMIUM · V3-P Refined materials. Updated construction. 6061 aluminum lower housing · Stainless steel shaft
White Nobi-style grip · Gersung A3 microswitches Single configuration · Rounded-square gate fitted as standard Before You OrderSingle Configuration — No body or grip color selection is required. Standard Gate — A rounded-square restrictor gate is fitted as standard. Optional Add-On — The V3 Restrictor Gate Set is sold separately and can be purchased together with the lever. Connection — An 8-pin connection uses individual microswitch terminals. An appropriate adapter harness is required for an existing 5-pin connector. 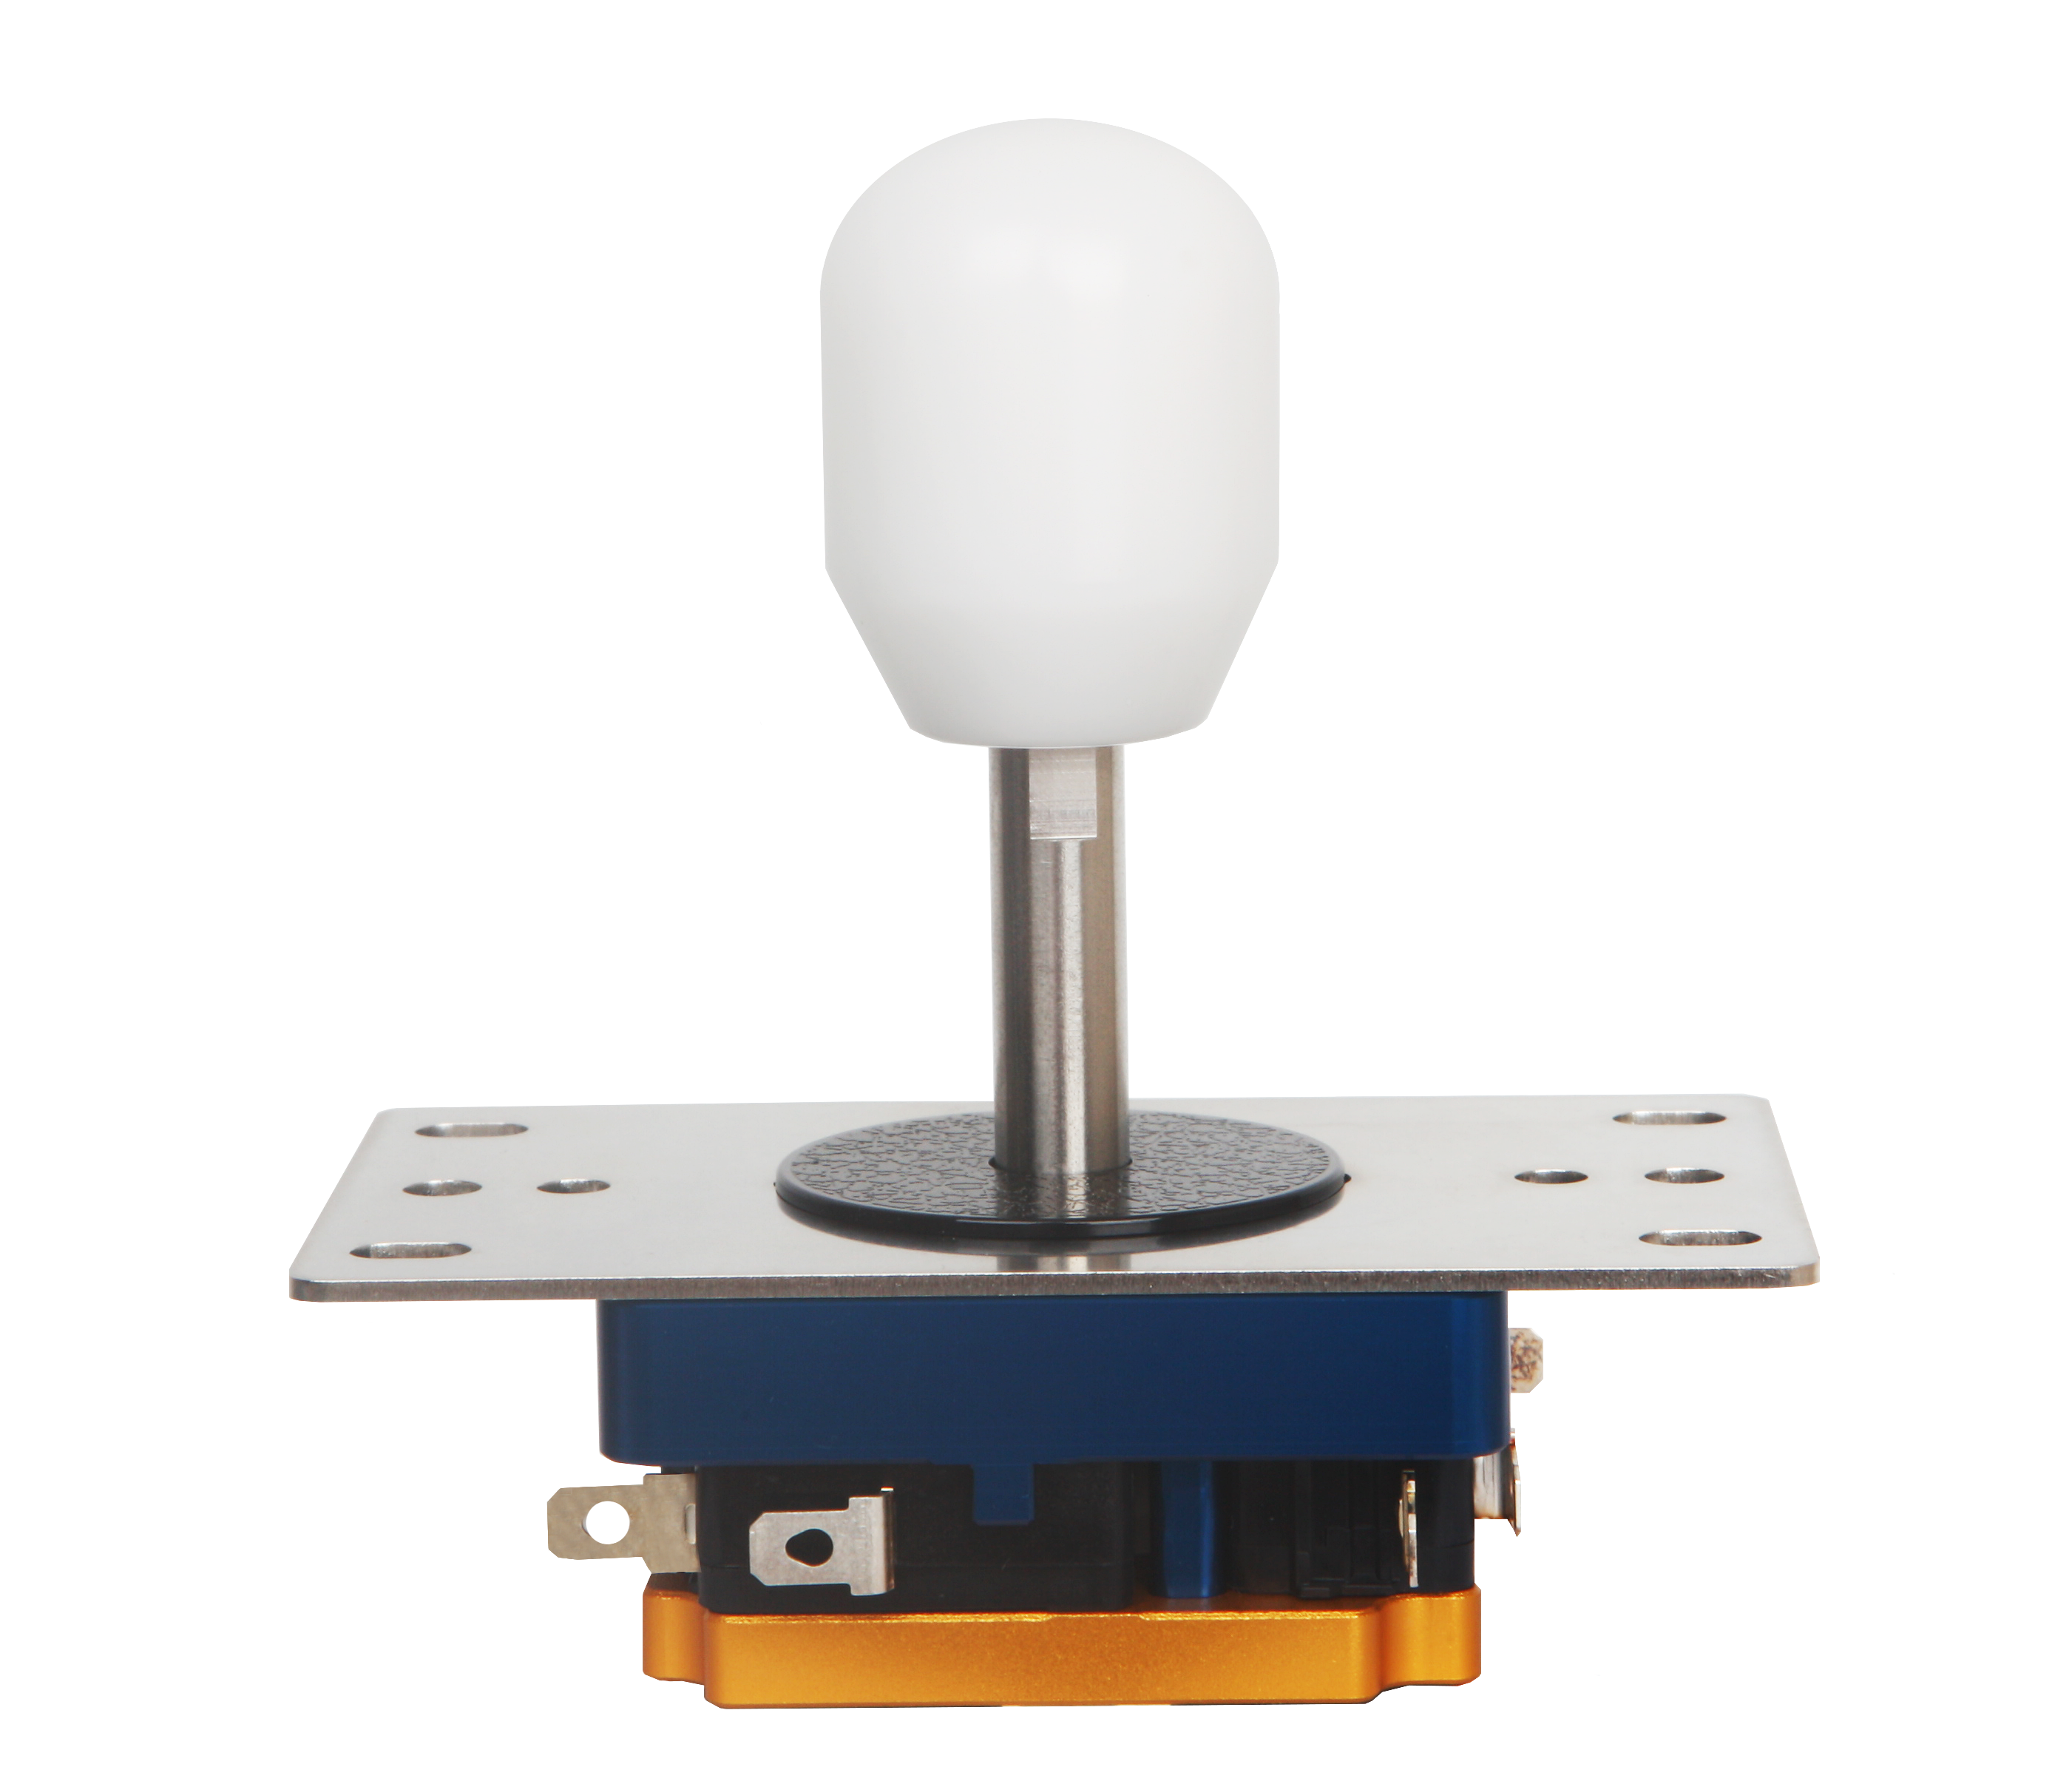 SANJUKS V3 Premium Lever · Single configuration 01 · SANJUKS V3 PREMIUM Five Updates in the V3 PremiumThe V3 Premium updates the original V3 with a revised lower housing material, pivot design, grip, shaft, and spring support components. These changes refine both the operating components and the serviceable structure. 01. 6061 Aluminum Lower HousingThe lower housing uses 6061 aluminum alloy, one of the key material changes from the original V3. 02. Replaceable Hemispherical Pivot BearingThe lower housing has been redesigned with a replaceable hemispherical pivot bearing. This serviceable design allows the bearing to be inspected and replaced as needed. 03. CNC-Machined White Acetal GripThe lever uses a Nobi-style grip CNC-machined from white acetal. The white grip shown in the photos is supplied with the standard configuration. 04. Stainless Steel Shaft with Bolt FasteningThe stainless steel shaft uses a bolt fastening system that helps prevent rotation when tightened. An 8 mm wrench can be used when installing the grip. 05. TP601 Spring Support ComponentsThe spring support components use TP601 red specialty plastic. These parts have also been updated from the original V3. 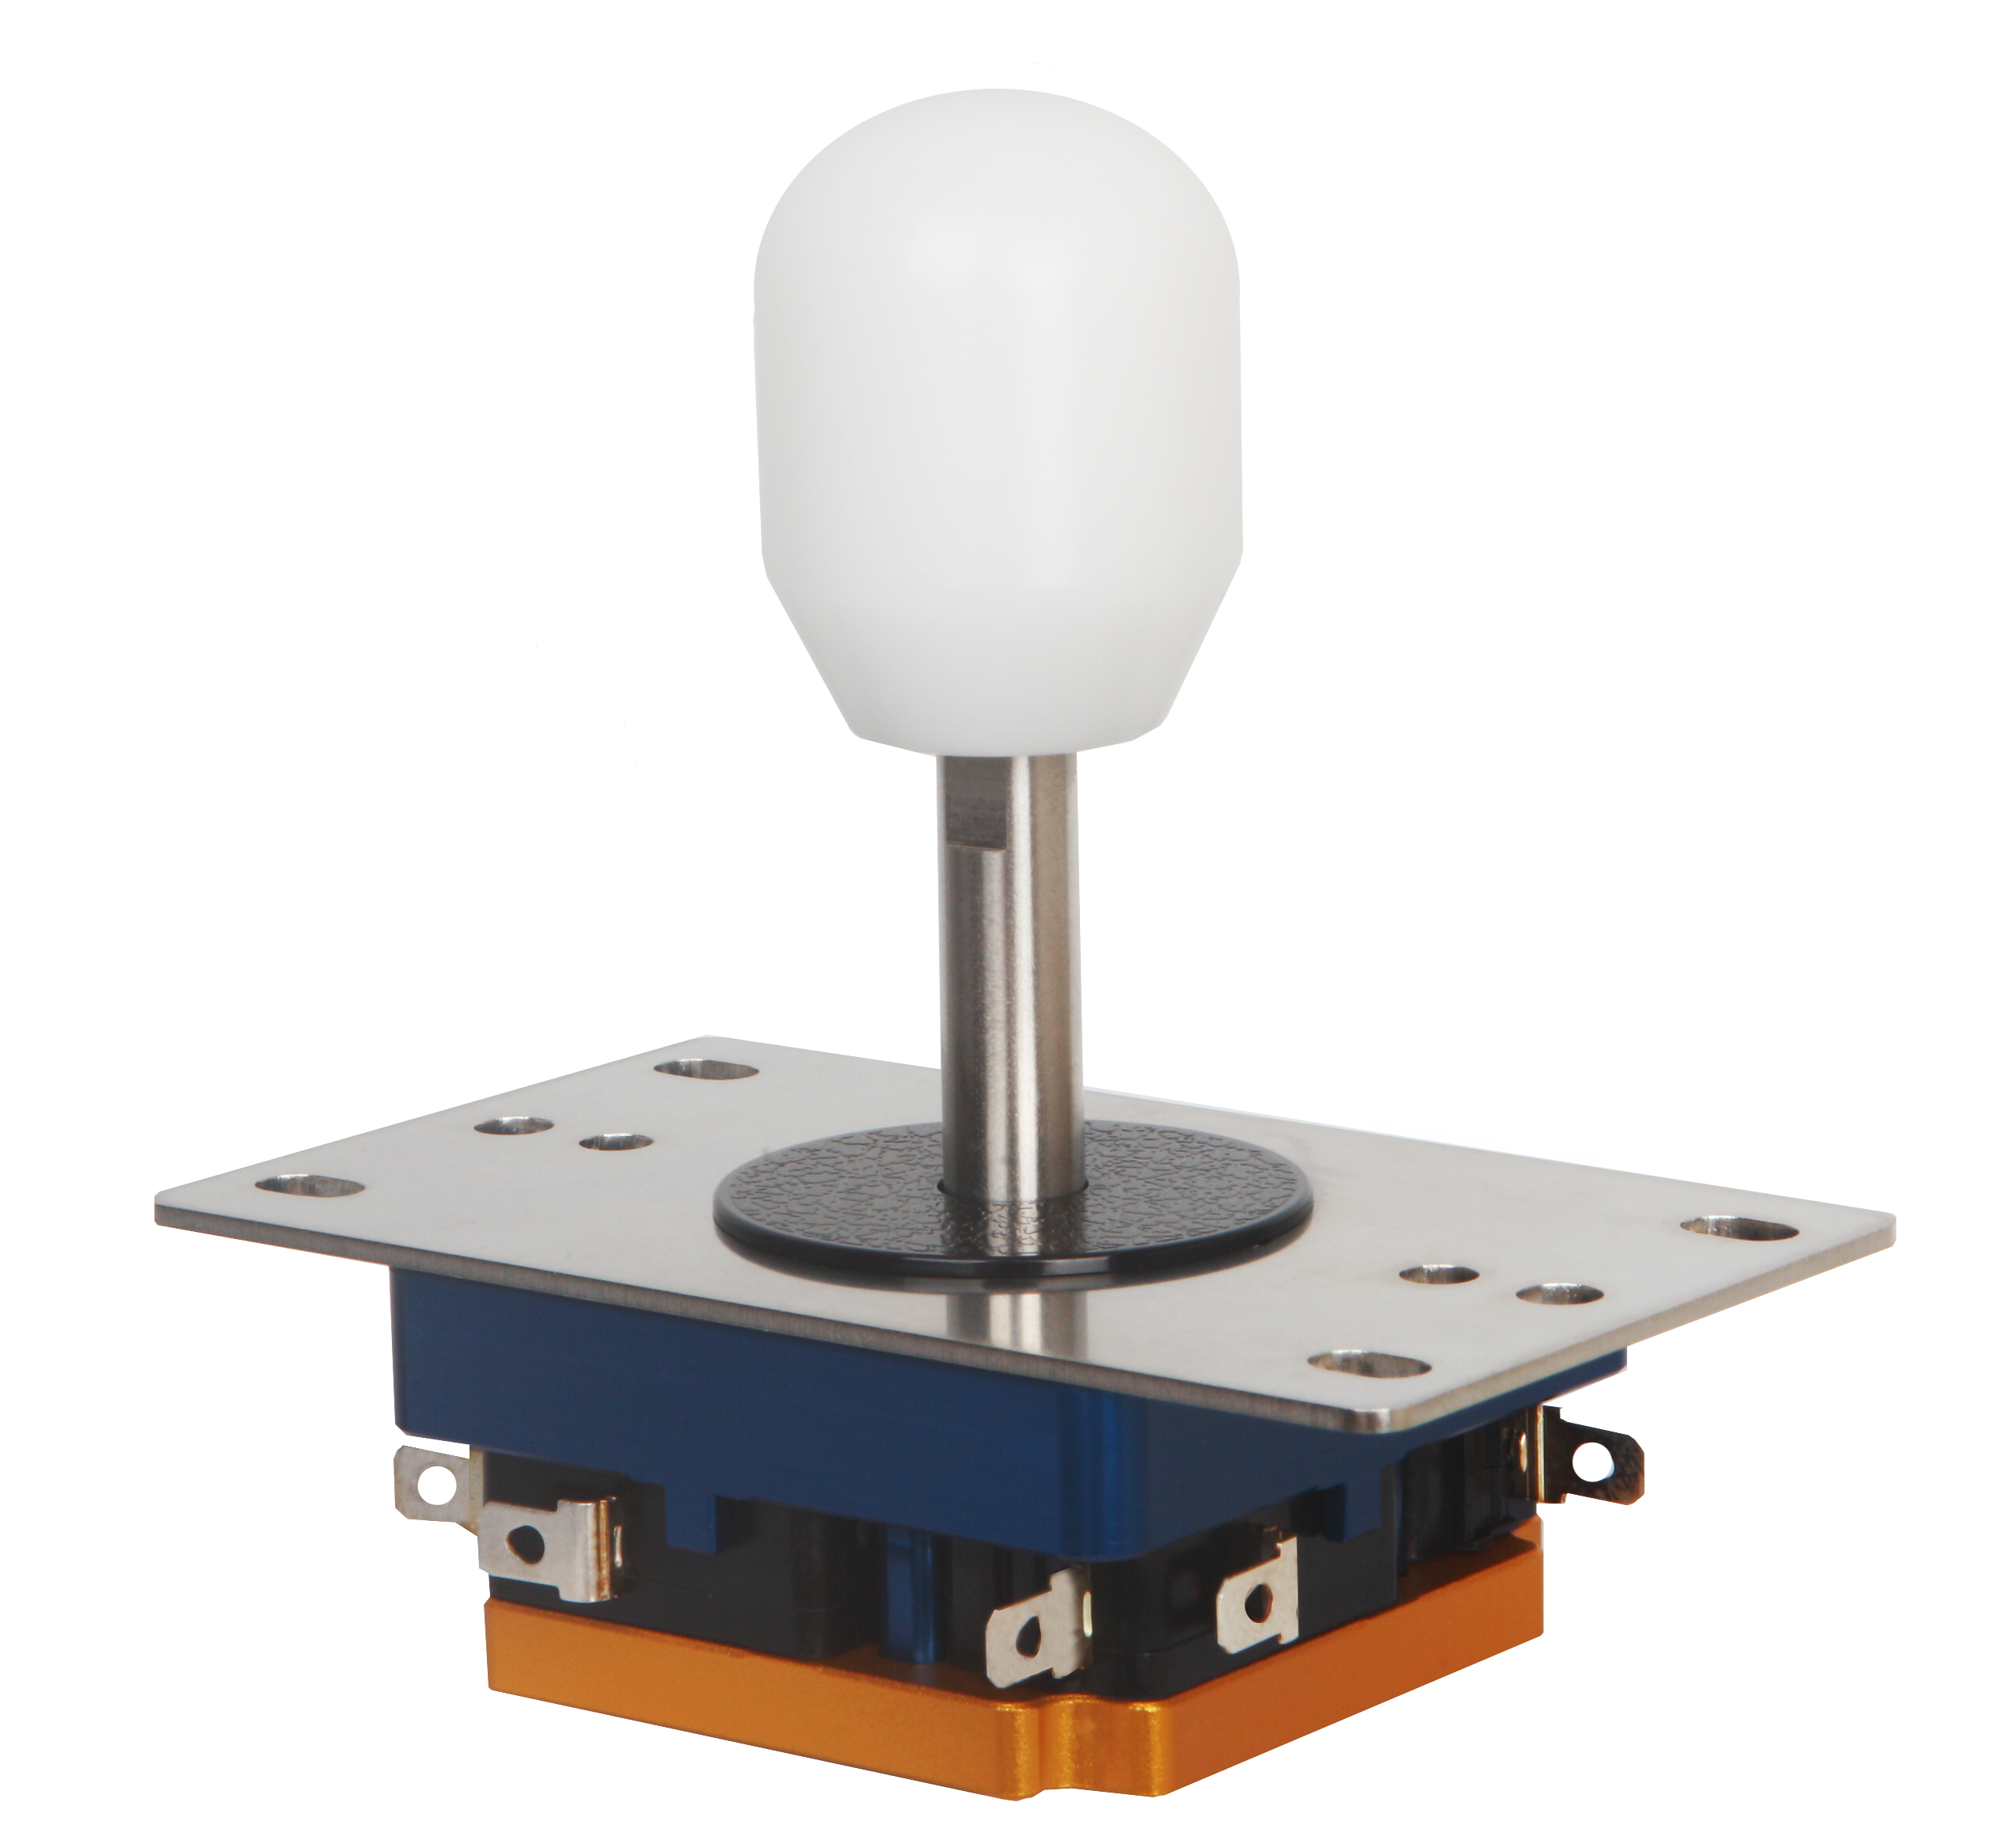 A closer look at the V3 Premium grip, shaft, and body construction. 02 · SANJUKS V3 PREMIUM Rounded-Square Gate as StandardThe V3 Premium comes fitted with a rounded-square restrictor gate. Its square-shaped travel boundary provides directional reference points with rounded corners. Rounded-Square Describes the Gate ShapeThe restrictor gate defines the shaft's travel limits. The lever supports up, down, left, right, and diagonal inputs; rounded-square refers to the shape of the opening inside the gate. 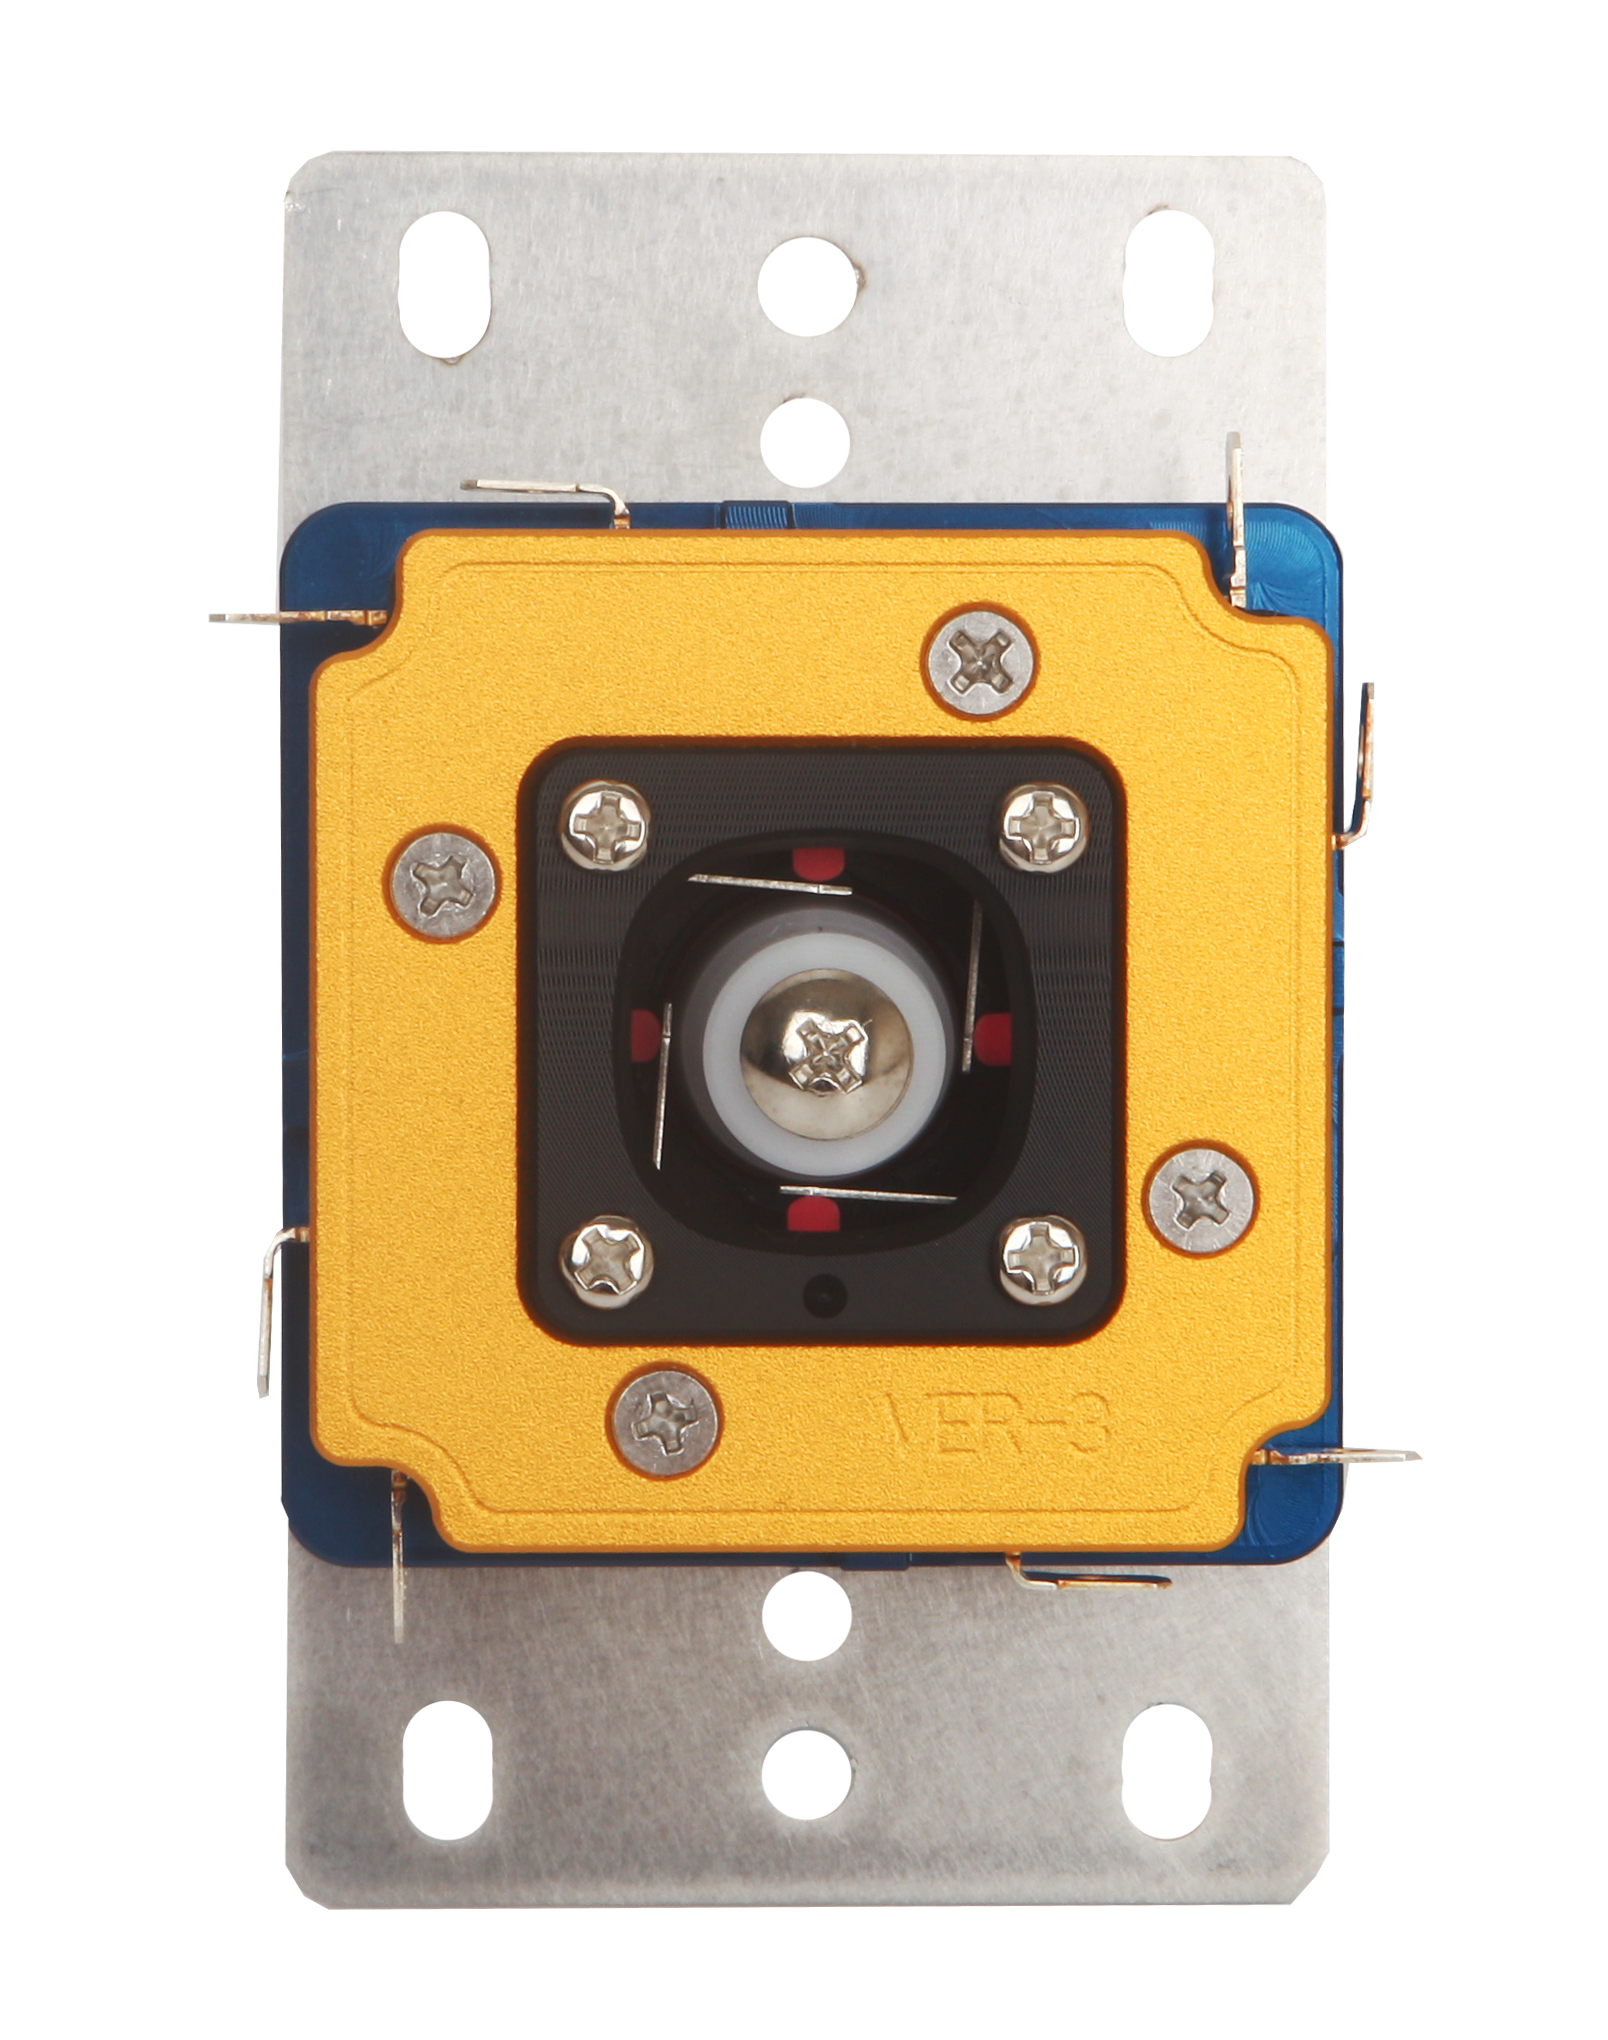 The black part on the underside is the standard rounded-square restrictor gate. Standard Gate vs. Optional Gate SetA rounded-square gate is fitted as standard. The square, octagonal, and circular gate set shown below is sold separately and is not included with the lever. 03 · SANJUKS V3 PREMIUM V3 Restrictor Gate Set · Sold SeparatelyTo try shapes other than the standard rounded-square gate, you can purchase the V3 Restrictor Gate Set. The set includes square, octagonal, and circular gates. Optional PurchaseThe V3 Restrictor Gate Set is sold separately and is not included with the lever. 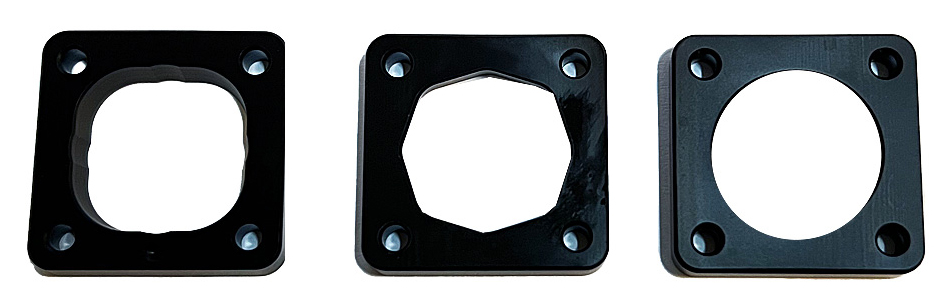 Left to right: Square / Octagonal / Circular. · Sold separately
Each gate shape changes the feel at the end of the lever's travel. The preferred feel depends on personal preference and the combination of parts. Choose a gate set specified for the V3. 04 · SANJUKS V3 PREMIUM Check Your Arcade Stick Before InstallationBefore installation, check the panel opening, mounting hole positions, internal clearance, and wiring. Internal layouts may differ between revisions or modified units, even under the same model name.
These are selected models listed as installation references. Confirm fit by comparing your arcade stick's panel and internal layout with the lever. 01. Flat Design and V3 Mounting PlateThe V3 Premium has a flat, collarless design and uses the SANJUKS V3 mounting plate. Compare the mounting holes in the drawing below with your case, and check for clearance around the shaft and panel.  V3 mounting plate drawing from the product listing. Compare it with your actual mounting area. 02. Body Height and Internal ClearanceThe listed body height is approximately 39.5 mm, excluding the grip, shaft, and collar. The listing notes that measurements may vary by 2–3 mm. Allow additional space for the switch terminals and wiring. 03. 8-Pin Connection and Adapter HarnessThe lever uses an 8-pin connection via individual microswitch terminals. Arcade sticks with an existing 5-pin connector require a 5-pin to 8-pin adapter harness. Check your PCB pinout and switch terminal specifications before choosing a harness. 05 · SANJUKS V3 PREMIUM Specifications and Package Details
Included Product and Optional Items
The optional gate set is supplied only when purchased as an add-on. The 8 mm wrench reference specifies a tool that can be used to install the grip. 06 · SANJUKS V3 PREMIUM Lever Feel and Component CareSpring Return FeelThe V3 Premium uses a spring-based mechanism. Resistance and return-to-center feel may vary with the condition of the spring and support components, as well as where you hold the grip. How the Gate and Switches WorkThe restrictor gate defines the lever's travel limits, while the Gersung A3 microswitches register directional inputs. Changing the gate alters the feel at the travel limits, so spend some time with the standard rounded-square gate first. Check the Grip and Shaft FastenersCheck that the grip and shaft are secure and have no unwanted play. An 8 mm wrench can be used to install the grip. Check the fastening carefully to avoid damaging bolts or threads. Choose Replacement Parts for the V3When replacing gates or internal components, check the product name, supported model, and specifications. Parts from other SANJUKS levers may not be interchangeable, even if they look similar. 07 · SANJUKS V3 PREMIUM First-Time Installation StepsSTEP 01 Disconnect Power and Record the Existing SetupUnplug the arcade stick's USB connection and disconnect power before opening the case. Photograph the existing lever orientation, wiring order, and mounting screw positions to help with reassembly. STEP 02 Check Mounting Positions and ClearanceCompare the V3 mounting plate holes with your case and check for interference around the panel and beneath the lever. Secure it where the switch terminals and wiring will not be pinched. STEP 03 Check the Grip and Gate FastenersCheck that the grip, shaft fastening bolt, and lower gate are secure. If you have installed an optional gate, check that its screws are evenly secured, then move the lever to check for interference. STEP 04 Connect the Wiring and Test Every DirectionConnect the switch terminals without stretching or pinching the wires. Remove your hands and tools from the case, then connect power and test up, down, left, right, diagonals, and neutral. If everything works correctly, disconnect power again before closing the bottom panel. If a Direction Is ReversedDisconnect power and check your original wiring photos and the PCB pinout. Identify the common and directional signal wires instead of relying on wire colors alone. Need Help with Fit or Gate Selection?
|



